
Those who regularly keep up with SEO trends have been talking about the transition from Universal Analytics (UA) to Google Analytics 4 (GA4) for a while. On July 1, 2023, this change will go into effect.
As a leading cannabis SEO agency prioritizing SEO education accessibility, we wanted to help your website or e-commerce platform make this transition as smooth as possible. With this step-by-step guide explaining how to go from UA to GA4, you’ll be ready for the switch this summer in 10 easy steps.
1. Getting Started: Navigate to GA and Select Property, then Views
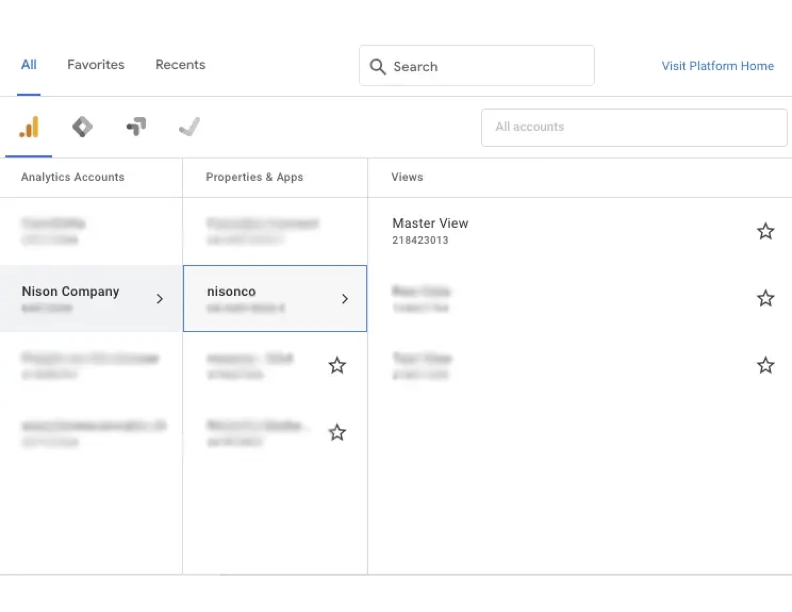
Navigate to GA and Select Property, then Views
First, you’ll need to navigate to analytics.google.com and click on the desired property to switch from UA to GA4. After you select your property, select “views.”
2. Click on Admin in the Bottom Right-hand Corner and Select GA4 Setup Assistant
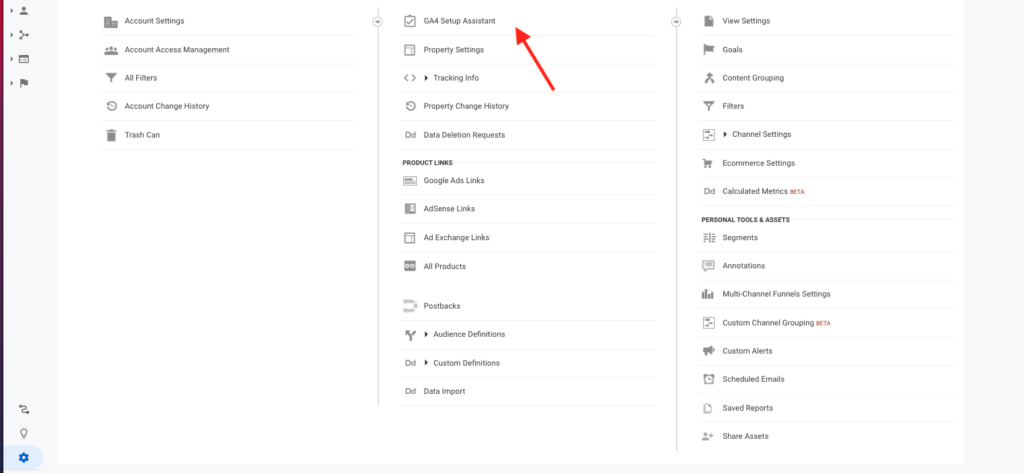
Click on Admin in the Bottom Right-hand Corner and Select GA4 Setup Assistant
Click on “Admin” in the bottom right-hand corner of the page and then click on “GA4 Setup Assistant,” found at the top of the second column.
3. Click the Get Started Button
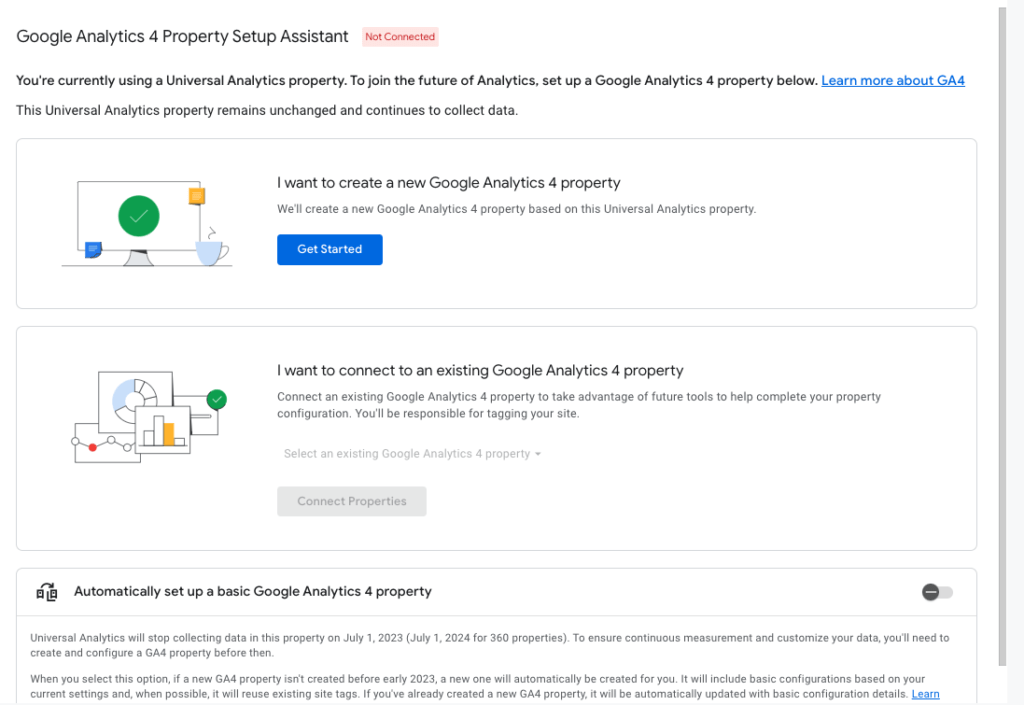
Click the Get Started Button
Under the text, “I want to create a new Google Analytics 4 property,” click the blue button that says “Get Started” to proceed.
4. Click Create Property
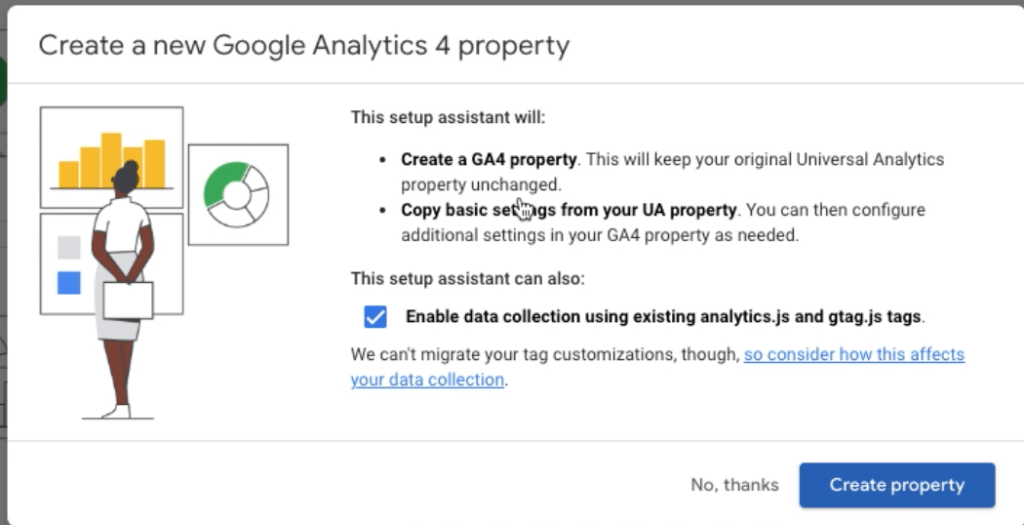
Click Create Property
After you click “Get Started,” you’ll see information about what the setup assistant will do for you. Click the blue button that says “Create property” to go on.
5. Click the Go to your GA4 Property Button
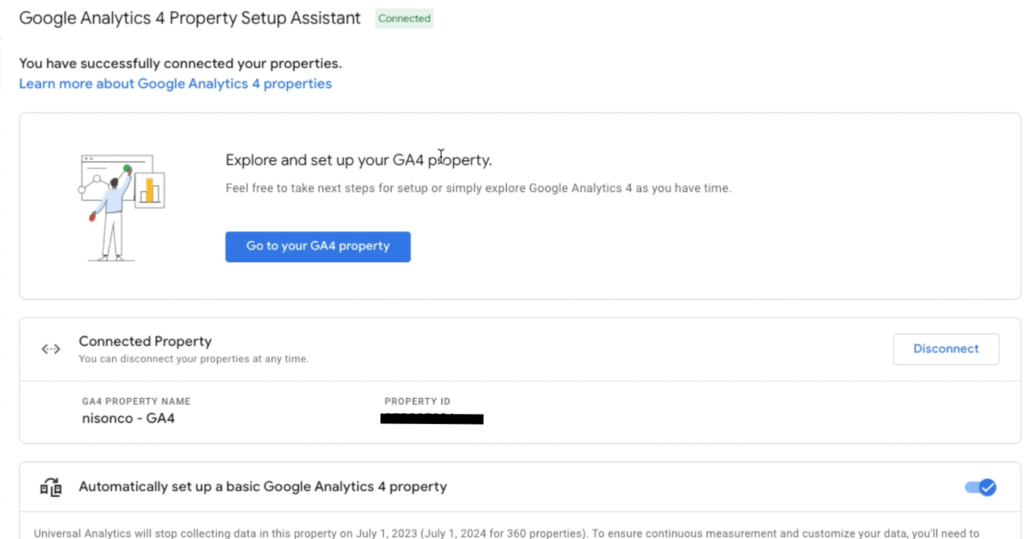
Click the “Go to your GA4 Property” Button
Next, we will get the code to embed on your site. Click the “Go to your GA4 property” button.
6. Under Data Collection Click the Arrow Next to Not Started
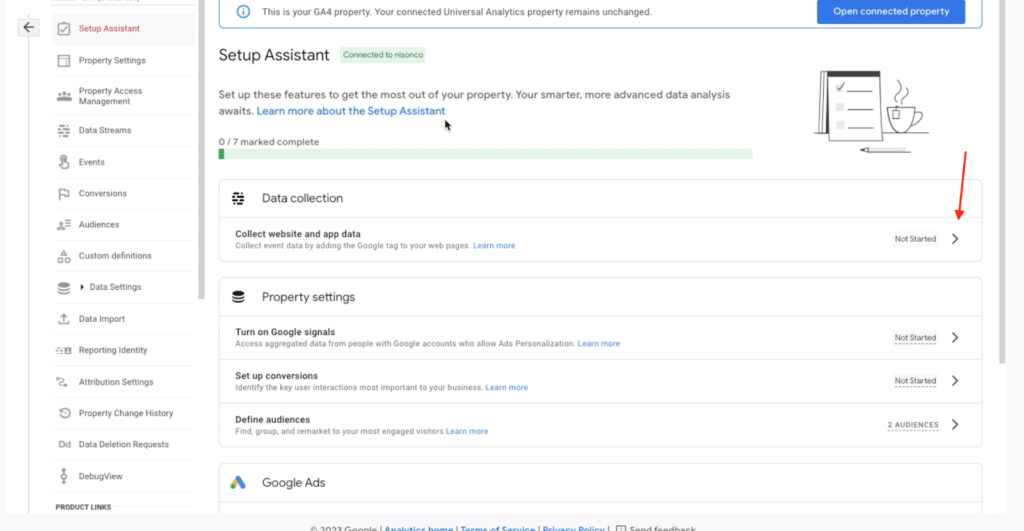
Under Data Collection, Click the Arrow Next to “Not Started”
Under “Data Collection,” click the arrow next to “Not Started” for the category reading “Collect website and app data.”
7. Click the Arrow Next To Your Property’s Stream

Click the Arrow Next To Your Property’s Stream
Click the arrow to the far right of your property’s stream to proceed.
8. Click the Arrow Next to Configure Tag Settings
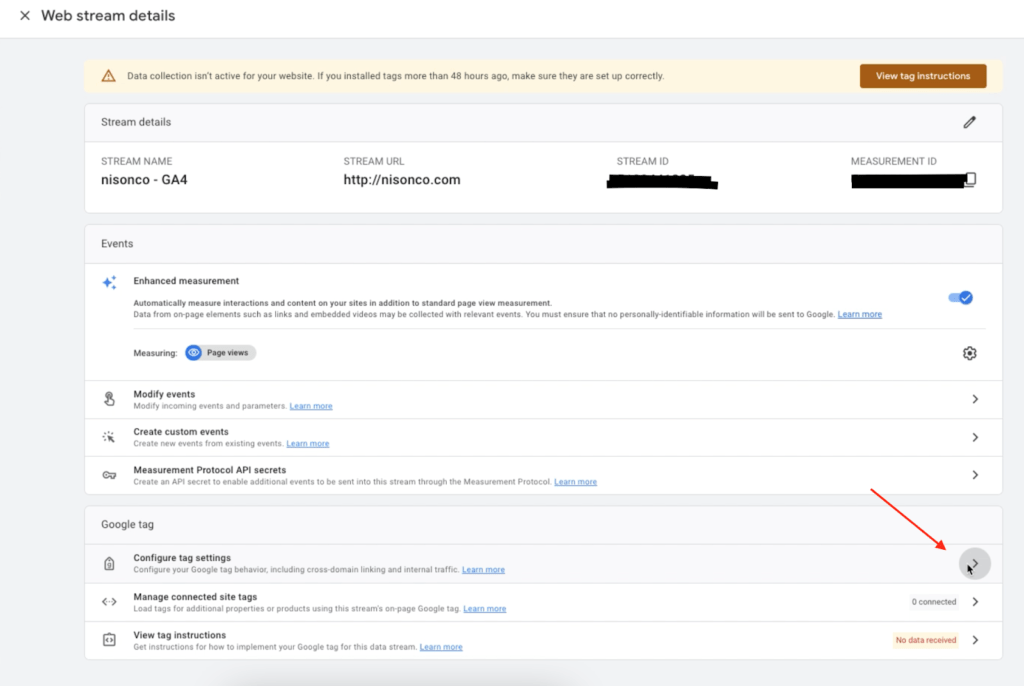
Click the Arrow Next to Configure Tag Settings
Under “Google tag” is an option to “Configure tag settings.” Click on the arrow to the far right of this option.
9. Click Installation Instructions
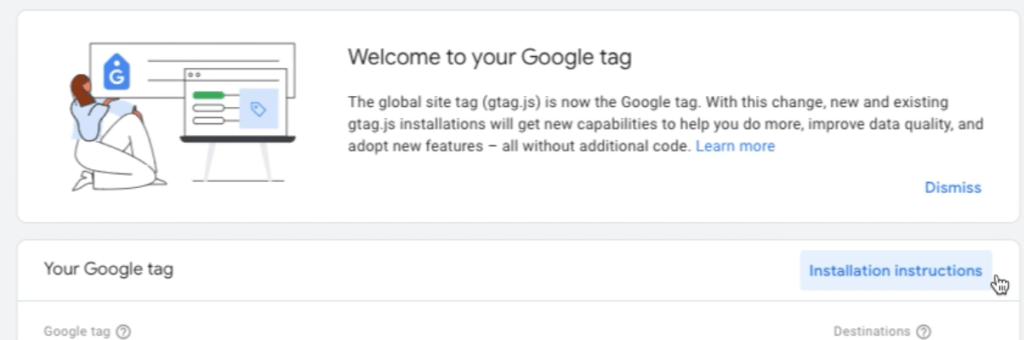
Click Installation Instructions
Select the blue “Installation instructions” button to the right of the text “Your Google tag.”
10. Install Google Tag manually
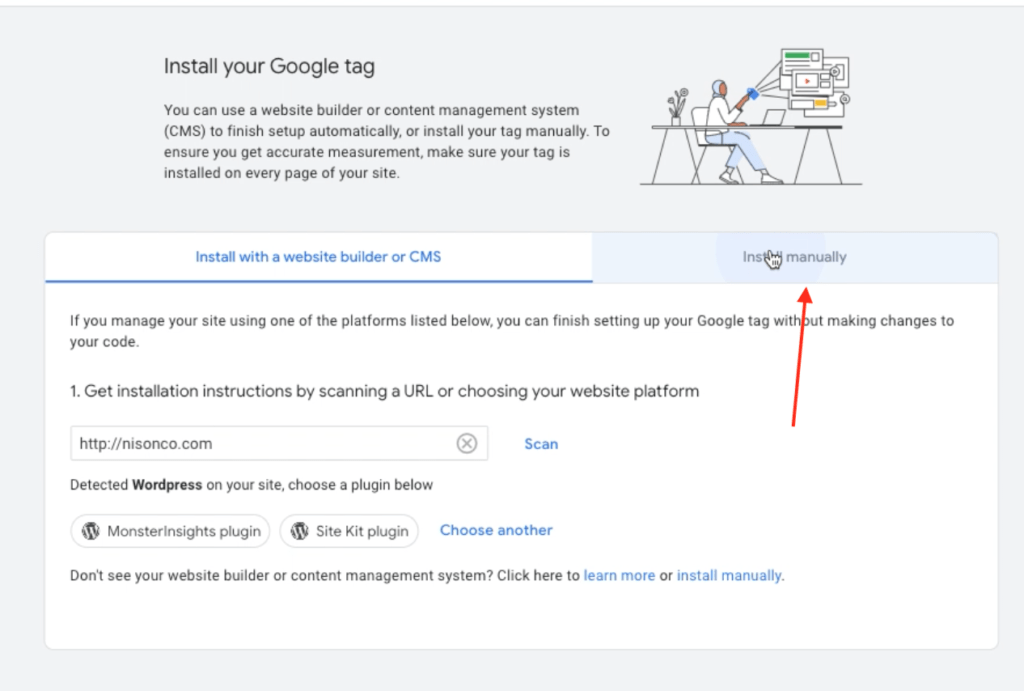
Install Google Tag manually
Finally, install Google Tag by clicking “Install Manually.” Copy and paste the tag into your footer code or use a plugin such as Google Site Kit.
Expert SEO Support for Google Analytics and Beyond
And there you have it — you’ve switched to GA4 in 10 easy steps and are ready for July. The world of SEO is constantly changing with the emergence of AI and the development of new technology. It’s essential to know how to fix common errors as they arise and keep up with the changing ways people search for products and information.
Check out the NisonCo blog for more marijuana SEO tips. Visit our SEO service page to explore our SEO services more in-depth.